Wednesday, November 23, 2011

Hakuhodo Haulage

I used to read Delicate Hummingbird religiously (and am gutted she no longer posts regularly, though her blog is still a phenomenal resource). I always marvel at her super lush looking brushes, particularly the Hakuhodo. But it wasn't until I stumbled across their promo video and just drooled over the care that they put into those brushes that I knew I had to own some (their marketing department totally got me, I hate when that happens!). My brother, most fortuitously, now resides in Tokyo, so I expect an entire carry-on of brushes on your return home, bro!

I ordered three brushes, the large pointed Yachiyo (a dupe of the NARS yachiyo), the S121G eyeshadow brush and the 212 Highlight brush (a favorite of delicatehummingbird herself). The order arrived very quickly and was shipped from a distribution center or HQ in Beverly Hills (no 2-week international shipping here).

The large pointed Yachiyo is wonderful and I use it regularly when applying pigmented blushes (Nars Exhibit A and Sunday Riley Intimate immediately come to mind). I find that it is quite easy to clean and, though I have had some shedding, I have not had any issues with the woven handle.


The Yachiyo compared to two others brushes in my collection: MAC 138 (left) and MAC 116 (right)


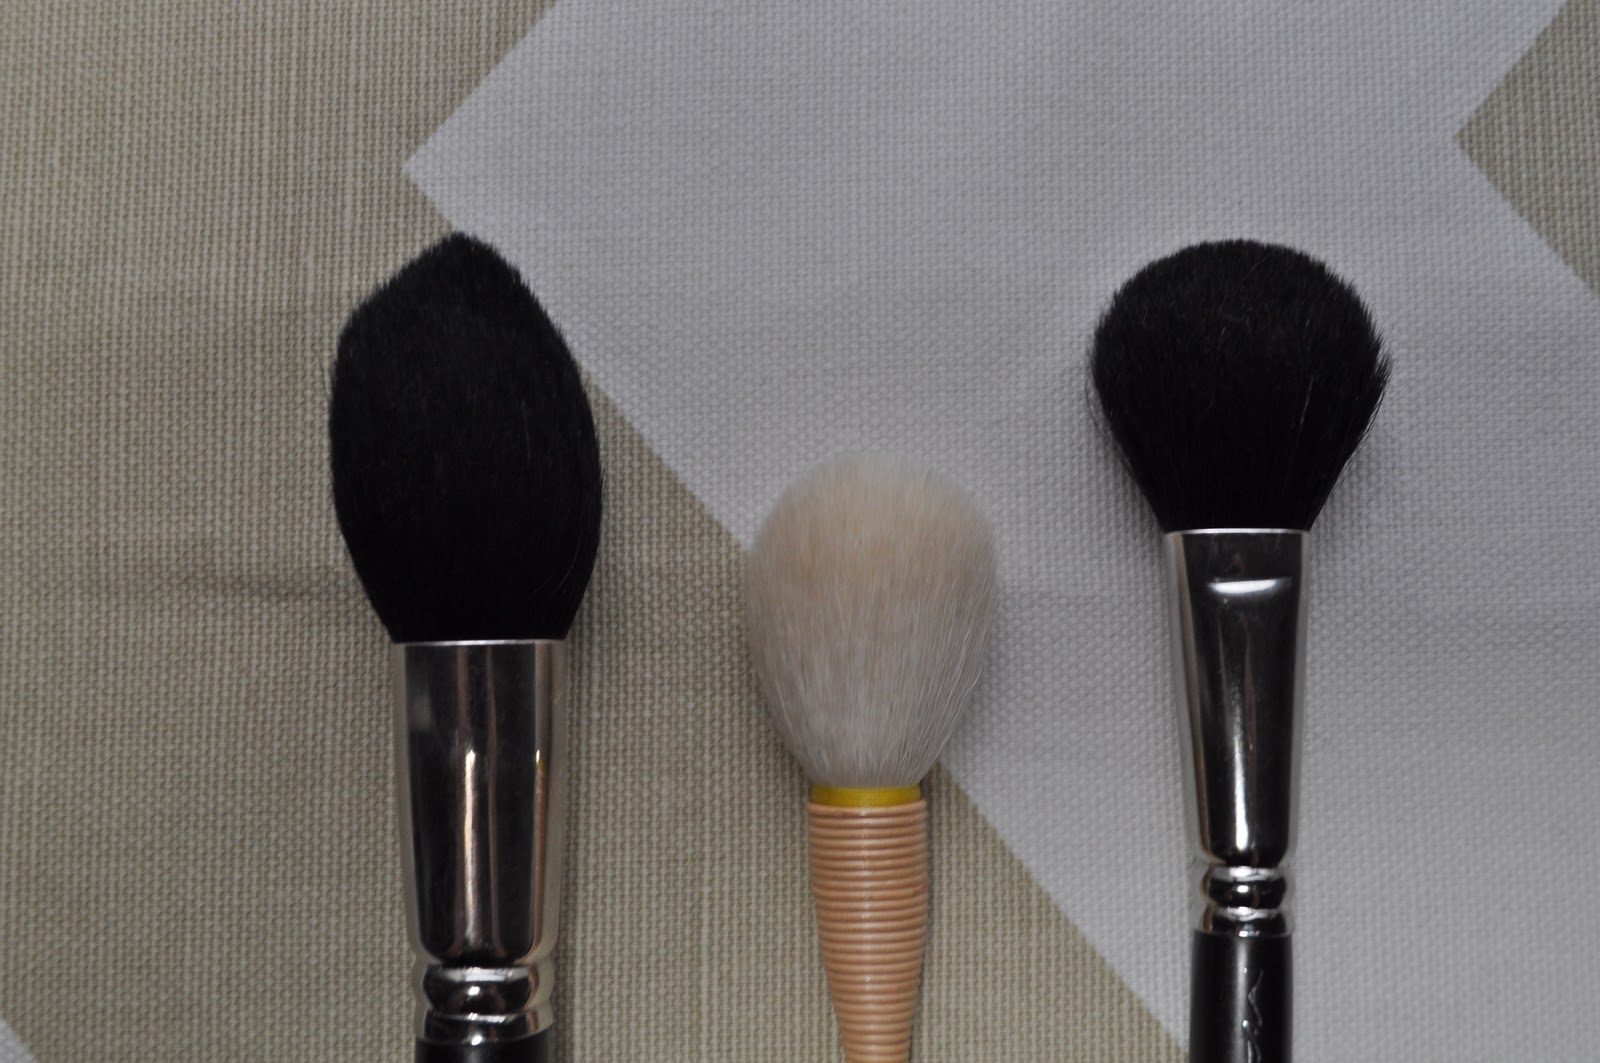
The highlighter brush surprised me, insofar as I find it terrible for highlighter but wonderful for setting powders. It is beautifully dense and absolutely perfect for bouncing powder onto the under eye area. I use the Le Metier de Beaute powder in Refresh and find that this brush gives the under eye area a natural finish, whereas other brushes often deposit too much powder and make me look crepey or cakey.

This brush is very similar in shape to a wickedly cheap Sonya Kashuk dupe which I've had forever, but is not even remotely comparable in quality. I find that the Hakuhodo brush is so much denser, that powder just sits perfectly on the tip of the brush. The Kashuk brush splays a bit more when used and I find that it just pushes product around.


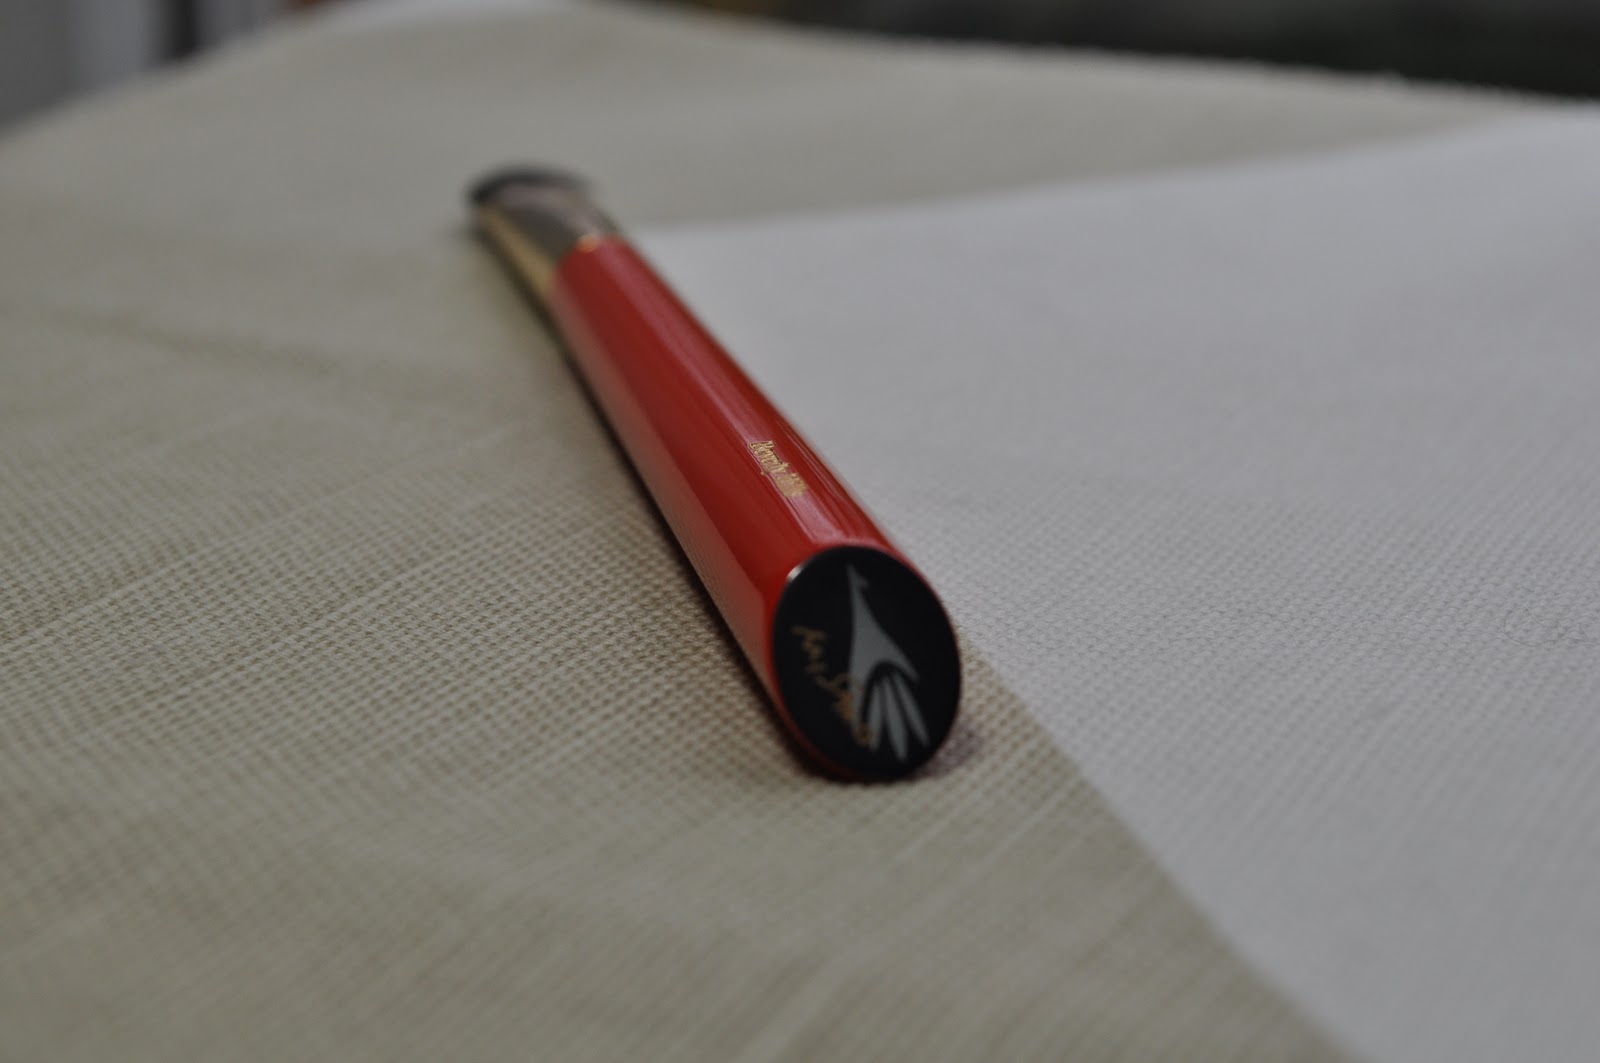
The S121G eyeshadow is the most beautiful brush I have ever owned. I am absolutely smitten with that hot vermilion handle - if I could justify it, I would  throw all of my brushes away and have a set just of these. Unfortunately... this is one of my least favorite and least used brushes. I find that the brush is just thismuch too big for my lid, thismuch too tapered, thismuch too floppy, to be a good brush for me. I now only use this brush with my Giorgio Armani ETK pots to create a very sheer wash of color. Otherwise, it's a trophy brush that just looks gorgeous in my brush holder.


Here is the S121G compared to a SE MAC 227, Sonya Kasuk shader, and MAC 239. As you can see, I own nothing remotely similar.


After many months of use, I can say with certainty that theYachiyo and highlighter brushes travel EVERYWHERE with me - they have become absolute staples in my modest brush collection. For the price, the Yachiyo is only slightly the choice over the Nars version ($48 over $50, Hakuhodo prices have sky-rocketed with production cost increases). But, I'd pick the Hakuhodo for the white goat hair, since it won't discolor your face like some dyed brushes are wont to do. If you're intrigued about the brand and considering an order, you won't do too badly with either choice.

xx
K

Wednesday, November 16, 2011

NARS sale on Gilt Groupe

I am not affiliated with Gilt Groupe in any way, but they have been stepping up their game in the beauty department and this deal is too good not to share.

Gilt City currently has an offer from Narscosmetics.com where $50 buys you $80 worth of product (access the deal here). That is a 37% savings (puts that Sephora VIB sale to shame!).The sale is running until 11/19/2011 at 10:00am. If you're not a member, you can sign up here (full disclosure, this is the "Give 20, Get 20%"  link; you and I both receive a discount if you sign up here).

I purchased the voucher on 11/14 and that baby burned a hole right through my pocket. I picked up the Douceurs de Paris palette, Ashes to Ashes single shadow and a bottle of Orgasm nail varnish. Borderline boring, but staples I have wanted for a while. If you're feeling adventurous, check out these ridiculous new Modern Kabuki holiday sets... Legitimately TDF.

BY TERRY Rouge Terrybly

We can thank an incredibly tenacious counter girl at Bloomies for this review. Seriously, we should all take lessons from this woman.

I had heard quite a bit about BY TERRY products and have seen them for sale online, but I had never seen them in person until I walked by a Space NK display at Bloomingdales. I was already sort of embroiled in my "Buy or not to buy" inner dialogue over the Rococo Gold Leaf Lacquer when I was totally struck by this pink/purple gloss at the BY TERRY counter. I asked the woman at the counter to try it out. While she indulged me, she kept rattling on about how I HAD to try this particular Rouge Terrybly lipstick. Just had to. In fact, she wouldn't let me walk away without applying it to my face. I relent and she walks over with a tube of hot fuchsia lipstick. There isn't but a stub left. She tells me that it's so popular, everyone wants to try it. Everyone says it's totally worth the $48 price tag.

Wait, what? Ok, now you lost me.

In any event, she applies the Rouge Terrybly lipstick and it's glossy and beautiful. But, I walk off convinced that I would never pay what they're asking for a hot pink lipstick I wouldn't wear but once. To my surprise, I walk around the rest of the beauty department and continually stop to admire how easily this pink wears, even for noon on a Thursday. As I drove home, I noticed that it didn't feather and wore to a beautiful pink stain.

I thought about this lipstick for a week.

Fast forward a few more days, when I purchase a Gilt Groupe coupon for Beautybar and see that Rouge Terrybly is offered on their site. At essentially 30% off, I allow myself to indulge. But, I go through the colors on the site and notice that By Terry offers four shocking pinks, all very similar. I scour beauty blogs for swatches but I'm still stumped. Finally, I call my Bloomies and ask this sales woman, "What spell have you cast and what the heck was that color?!?".

Enter Rouge Terrybly in Torrid Rose:


By Terry describes this lipstick as "the first volume & firmness lipstick enriched with the BY TERRY exclusive and anti-aging Limilip® Technology to rejuvenate and embellish every smile with silky colors. An extra-comfort and "push-up" lip elixir, wrapped in its satin bag for a beauty touch-up at any time". The lipstick is infused with hyaluronic acid to impart moisture and deliver a mild plumping effect, though I can't really speak to the latter. The lipstick is quite moisturizing, but leaves a dry stain as it wears.

The packaging tries very hard, truly, though for $48 I'd almost want Guerlain luxe. The tube comes packaged in a purple silk pouch with a draw string, which is sweet but a bit unnecessary (oh what do I know, I keep it in the pouch). The lipstick tube itself is quite pretty but feels small. However, the mirrored finished looks gorgeous in hand and the cap is handily magnetized and snaps into place when closed.


The color itself is beautiful - a grown-up fuschia. The glossy finish looks polished and pretty without compromising the fashion forward hue. And, despite my initial concerns about wearability, I wear this color frequently.

Rouge Terrybly in Torrid Rose on fair skin (Chanel 02 Porcelain, Giorgio Armani 4.0).

Again, as it wears, it fades to a beautiful stain that has great lasting power. Even when rubbed vigorously with a tissue, the color remains. It's great for those of us who aren't keen on the idea of constant touch-ups.


Verdict: If you have the money lying around (or the coupon codes), a must have!

Monday, November 14, 2011

Butter London Nail Skin Stickers

I'm a big fan of Butter London. Ever since my first bottle of All Hail McQueen (before they renamed it) I have been absolutely smitten with their nail polishes. I even love their nail care products and use their "Melt Away Cuticle Eliminator" every time I sit down to paint my nails. And, while the price is a bit steep (not anywhere near Chanel prices at $14, but still requires a second gulp when compared with Essie or OPI), it is almost always worth it.

So, when I stumbled across Butter London's new Nail Skin Stickers in Black Blue Wallpaper (retail price, $10) during the Nordstrom half-yearly sale, I threw them in my cart. Though I have no experience with nail polish strips or stickers, the sort of Victorian goth vibe of the stickers convinced me that I should give it a try. 

Butter London Nail Skin Stickers
Cute sticker on the back resembles a wax seal. 

The packaging is really darling but different from some of the other nail strips that I have seen. Rather than separating each nail strip, they are arranged together on a sheet. On inspection, they are truly stickers and not at all like any of the other nail strips I have seen. 


The shape of the nail sticker is odd, as one side is quite square and the other is more round. While my nail beds are more round on the second through fifth finger, the nail bed on the thumb is quite square. When I tried to apply the nail sticker with the squared end at the cuticle, I noted in doing so I would lose most of the beautiful design on the sticker once it was cut to fit.


On the other hand, if I applied the nail strip with the rounded end at the cuticle, there was more nail exposed then I would have preferred. 


To avoid too much negative space on the nail, I went ahead and painted my nails with an Essie First Base base coat and two coats of OPI's Black Onyx to prep. Then I applied the stickers as instructed. 

Much less bare nail exposed with two coats of OPI's Black Onyx as a base.

I then trimmed the end of the sticker just above the nail tip and filed with a crystal file. The file just sort of scored along the edge, so I used a small pair of scissors to remove the rest of the sticker along the scored edge. Unfortunately, after using a file, the tip of the nail looked white. It contrasted starkly with the beautiful black and looked a bit strange. So, for the rest of the nails, I simply trimmed the stickers as close to the nail as possible. 


The final product was... not ideal, which was such a bummer, to be sure. The stickers were very difficult to smooth, and the sticker rippled at the end of the nail. Even after vigorous smoothing with my fingers and then with an orange stick, the rippling did not resolve. When I added a top coat, as recommend in the instructions, the polish sort of settled atop the ripples and made it look a bit worse.


I wondered whether my decision to add a base polish was the reason for the rippling problem. So, I removed the polish from my right hand and placed the stickers on a clean nail. The result was very much the same. Worse, because there was so much exposed nail around the sticker. 

More exposed nail than I'd be happy to look at. 

Don't mind the black polish on my fingers, but do note the rippling on the free edge.

I removed the stickers right away, since I was not pleased with how they applied. They were a bit of a pain to remove, as the stickers are quite sticky, which may be a testament to staying power if you can get them to work for you.

To be fair, I am new to nail strips and the learning curve may well be huge. However, I imagine that this product is quite different from the nail strips I've seen from Sally Hansen and Incoco, so I may not be the only one. 

Verdict: Pass.